istio 初体验
使用虚拟机搭建 minikube + istio,体验 istio
设置 cpu 2 核,内存 4G
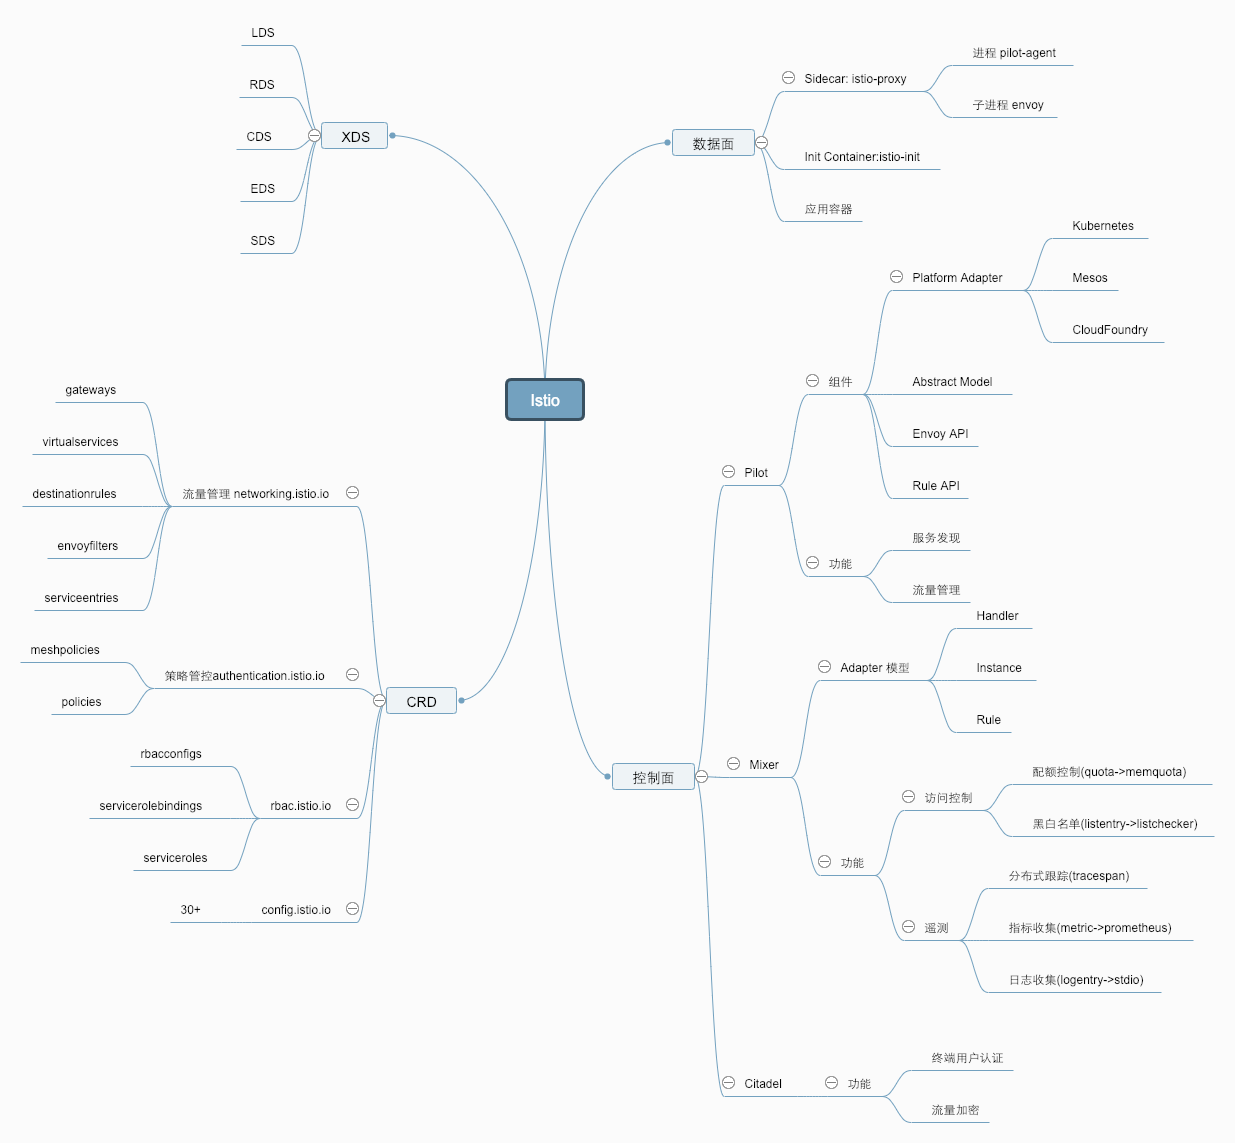
Istio 知识图

虚拟机
- 使用 VMWare,镜像为 centos7
安装步骤
关闭防火墙
- 关闭防火墙
1
2
$ systemctl disable firewalld
$ systemctl stop firewalld
安装 Docker
1 | $ sudo yum install -y yum-utils \ |
安装 kubectl
1 | $ curl -LO https://storage.googleapis.com/kubernetes-release/release/`curl -s https://storage.googleapis.com/kubernetes-release/release/stable.txt`/bin/linux/amd64/kubectl |
安装 minikube
1 | $ curl -LO https://storage.googleapis.com/minikube/releases/latest/minikube-linux-amd64 \ |
安装 istioctl
1 | $ curl -L https://git.io/getLatestIstio | sh - |
安装 istio 核心
进入到上一步下载的文件夹中执行如下操作
1
2
3
4
# 安装istio自定义的一些 k8s crd
$ for i in install/kubernetes/helm/istio-init/files/crd*yaml; do kubectl apply -f $i; done
$ kubectl apply -f install/kubernetes/istio-demo.yaml验证安装:
1
2
$ kubectl get svc -n istio-system
$ kubectl get pods -n istio-system
运行bookinfo示例
- 参考官方文档
部署服务
1 | # 给 default namespace 打标签,启动 istio reject |
部署 gateway
1 | $ kubectl apply -f samples/bookinfo/networking/bookinfo-gateway.yaml |
- 要确认Bookinfo应用程序正在运行,请通过curl某个Pod中的命令向其发送请求,例如ratings:
1
2
$ kubectl exec -it $(kubectl get pod -l app=ratings -o jsonpath='{.items[0].metadata.name}') -c ratings -- curl productpage:9080/productpage | grep -o "<title>.*</title>"
<title>Simple Bookstore App</title>
确定入口IP和端口
- 官方文档
- 确定了ip & 端口,可以从外部访问
Istio的一些简单功能
- 基于上述的demo,测试一些 istio 的简单功能
基于权重的路由
通过CRD DestinationRule创建3 个reviews 子版本:
1
$ kubectl apply -f samples/bookinfo/networking/destination-rule-reviews.yaml
通过CRD VirtualService 调整个 reviews 服务子版本的流量比例, 设置 v1 和 v3 各占 50%
1
$ kubectl apply -f samples/bookinfo/networking/virtual-service-reviews-50-v3.yaml
刷新页面, 可以看到无法再看到reviews v2的内容, 页面在v1和v3之间切换.
基于内容路由
修改reviews CRD, 将jason 登录的用户版本路由到v2, 其他用户路由到版本v3.
1
$ kubectl apply -f samples/bookinfo/networking/virtual-service-reviews-jason-v2-v3.yaml
刷新页面, 使用jason登录的用户, 将看到v2 黑色星星版本, 其他用户将看到v3 红色星星版本.


